
Monitor Recovery Testing Devices in Console
From Recovery Testing Dashboard
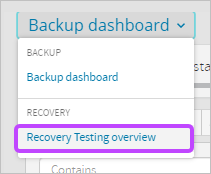
From the N-central Backup Dashboard, you can view the dedicated Recovery Testing dashboard overview.
Select Cove > Cove > Backup Dashboard from the vertical menu on the left hand side. From the drop-down in the top left, click Backup dashboard > Recovery Testing overview.
From this dashboard, you will see a specified set of columns detailing information relevant to Recovery Testing, including the data sources selected, the status, plan and recovery agent associated to the device, along with some other information.
The recovery agent is the location at which the recovery is processed and the Virtual Machine is created.
If no devices are assigned to Recovery Testing, the dashboard will display a message to advise, along with a button to add.
Recovery Progress
From the Recovery Testing dashboard, the Recovery Progress column can be added, which will allow you to see the progress of the recovery as a percentage.
To add this column:
- Select Columns.
- Search for and select Recovery Progress.
- Click Save.
Searching
Searching within the Recovery Testing Dashboard can be done by using the search box just above the devices list.
In here, you can search by the following criteria:
- Device Name
- Customer Name
- Recovery Agent
Filtering
The Recovery Testing Dashboard also includes functionality to filter devices using the filter menu to the left of the device list and can be displayed or hidden by clicking the double arrows.
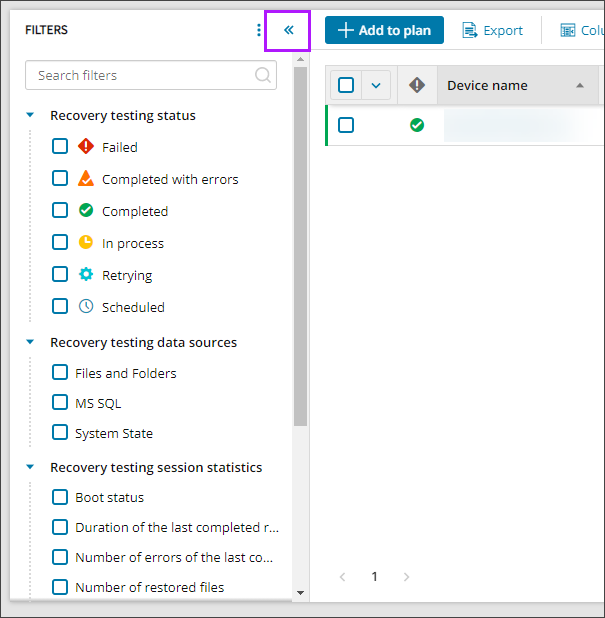
From this menu, you can filter by:
- Recovery testing status
- Failed
- Completed with errors
- Completed
- In process
- Retrying
- Scheduled
- Recovery testing data sources
- Files and Folders
- MS SQL
- System State
- Recovery testing session statistics
- Boot Status
- Duration of the last completed recovery testing session
- Number of errors of the last completed recovery testing session
- Number of restored files
- Number of selected files
- Recovery testing agent location
- Recovery testing plan
- Restored size
- Screenshot
- Selected size
- Recovery testing status of the last completed recovery testing session
- Timestamp of the last completed recovery testing session
Widgets
Three widgets can be maximized at the top of the page, which allow for further filtering.
Device recovery status
This widget allows you to filter the devices by recovery status:
- Completed
- Completed with errors
- Failed
- In process
- Retrying
- Scheduled
VDR checks time frame
This widget allows you to see the percentage of devices whose recovery check completed within the following day ranges:
- < 1 day
- 1 - 7 days
- 7 - 14 days
- 14 - 28 days
- > 28 days
- No checks
Device restore time frame
From this widget, you can filter devices by the how recent restores are done by the following time frames:
- < 4 hours
- 4 - 12 hours
- 12 - 24 hours
- > 24 hours
- No restores
Exporting
You may export a list of devices currently assigned a recovery testing plan by clicking Export.
This will then provide a separate dialog where you can choose to export in either XSLX or CSV.
Manage Table Columns
The N-centralBackup Dashboard allows you to manage the tables columns that can be seen within the Recovery Testing dashboard.

In the Columns dialog, you can select and deselect columns based on the information you wish to view from the dashboard.
From Main Dashboard
Users of all roles can view devices in the Console with Recovery Testing enabled. They appear as regular Backup Manager devices in the Backup Dashboard module and can be filtered by:
- Click the Columns drop-down .
- Search for and tick Recovery Plan.
- Click Save.
- Using the Select filter drop-down, filter by Recovery Plan.
- In the new filter box for Recovery Plan, tick enabled.
Your devices list will now show only devices where Recovery Plan is enabled.
Accessing device properties
As with any normal device, when you click on the devices name, you will see the Device Properties dialogue, which will give you details of the backup device, including the backup and restore history for the device and any errors.
With the Recovery Testing feature, the Settings tab will display an entry to advise what plan is assigned to the device.
If no plan is assigned to the device, and the device is detected as compatible, you will see an option to add the device to a plan.
View Recovery Testing results and check screenshots
To view statistics of the Recovery Testing and check the screenshots to ensure this has been successful, follow one of the below methods:
From Device Properties
- Click the device name to open Device Properties.
- Navigate to the Recovery Testing Verification tab.
From Main Dashboard
- Click the Columns drop-down.
- Search for and tick:
- Recovery Plan.
- Virtual Disaster Recovery data session verification details (restore).
- Virtual Disaster Recovery data timestamp of the latest completed session (restore).
- Click Save.
- Using the Select filter drop-down, filter by Recovery Plan.
- In the new filter box for Recovery Testing, tick enabled.
- You will now see the three extra columns appear to the right hand side of the devices table.
- Where a plan has been successful, you will see Verification result in the VDR Verification (restore) column, click this. This will take you in to the Device Properties dialogue, where you will see the Recovery testing verification tab.
From Recovery Testing Overview Dashboard
- Navigate to the N-central Backup Dashboard.
- Click Backup dashboard > Recovery Testing overview.
- Click View under the Screenshot column.
- This will take you in to the Device Properties dialogue, where you will now see the Recovery testing verification tab.
If an error was found during the recovery, you can view a wider look at the error details from the Recovery session errors dialog box.
This can be accessed by hovering over the recovery session with the error and selecting to show the Recovery session errors.
Recovery Testing Verification
In the Recovery Testing Verification tab you will see the screenshot taken from the virtual machine during the boot phase of Recovery Testing.
In this tab, you will also see information on the device, such as system uptime, when the session was last recovered, services that were stopped in order to perform the recovery and system log information.
In the case of a failed test recovery, the captured screenshot may not display the error or state that caused the failure. To understand the cause of the failed restore, we recommend using the virtual recovery option in the Backup Manager or Recovery Console to recreate and diagnose the issue.