
Manual migration of Cloud Solution Provider from DAP to GDAP
In their drive to implement a Zero Trust strategy across their products, service and partner ecosystem, Microsoft have adopted a "least privilege access" approach to authentication . As part of this change, Microsoft announced that from the 22nd May 2023 they will begin transitioning active and inactive Delegated Admin Privileges (DAP) relationships to Granular Delegated Admin Privileges (GDAP) with limited Microsoft Entra ID roles, with existing DAP relationships removed within 30 days of DAP’s End of Life.
Depending on your integration model, this change may impact on how you authenticate with Microsoft Intune.
-
System integrator (SI) model: unaffected by this Microsoft change, and the integration will continue to function as normal
-
Cloud Solution Provider (CSP) model: requires a new Admin Relationship for each of the integrated customers
CSP integration: configure each customer's Admin Relationships
There are three steps in the admin relationship configuration process:
Once the admin relationship are setup for each customer, the final stage is to switch your N-central integration to GDAP account enabled.
1. Create a new Admin Relationship for the customer
Microsoft has removed the DAP relationships for all older customer accounts, and it automatically created GDAP relationships for them. The problem is these new GDAP relationships don’t have the right permissions to work properly with Intune. To fix that, you must complete the following steps:
-
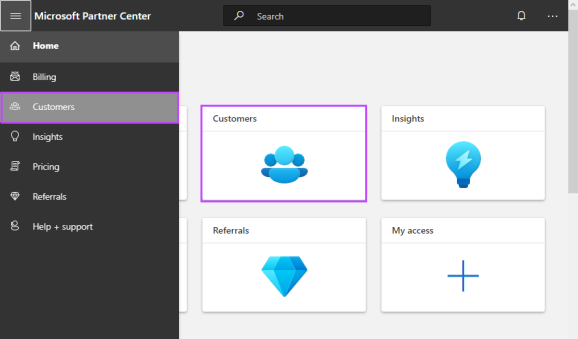
Log into the Microsoft Partner Center with your CSP Microsoft account credentials.
-
Click on the Customers Workspaces tile, or from the menu, choose Customers.
-
Search for and select the target customer.
-
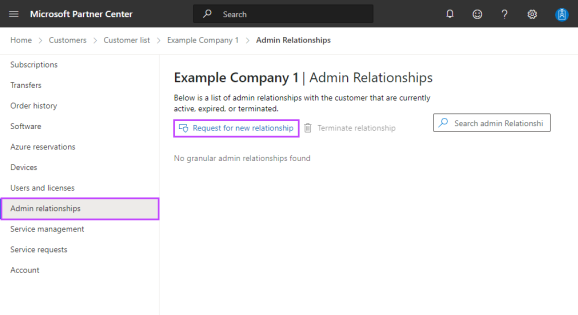
Click Admin Relationships from the navigation panel on the left.
-
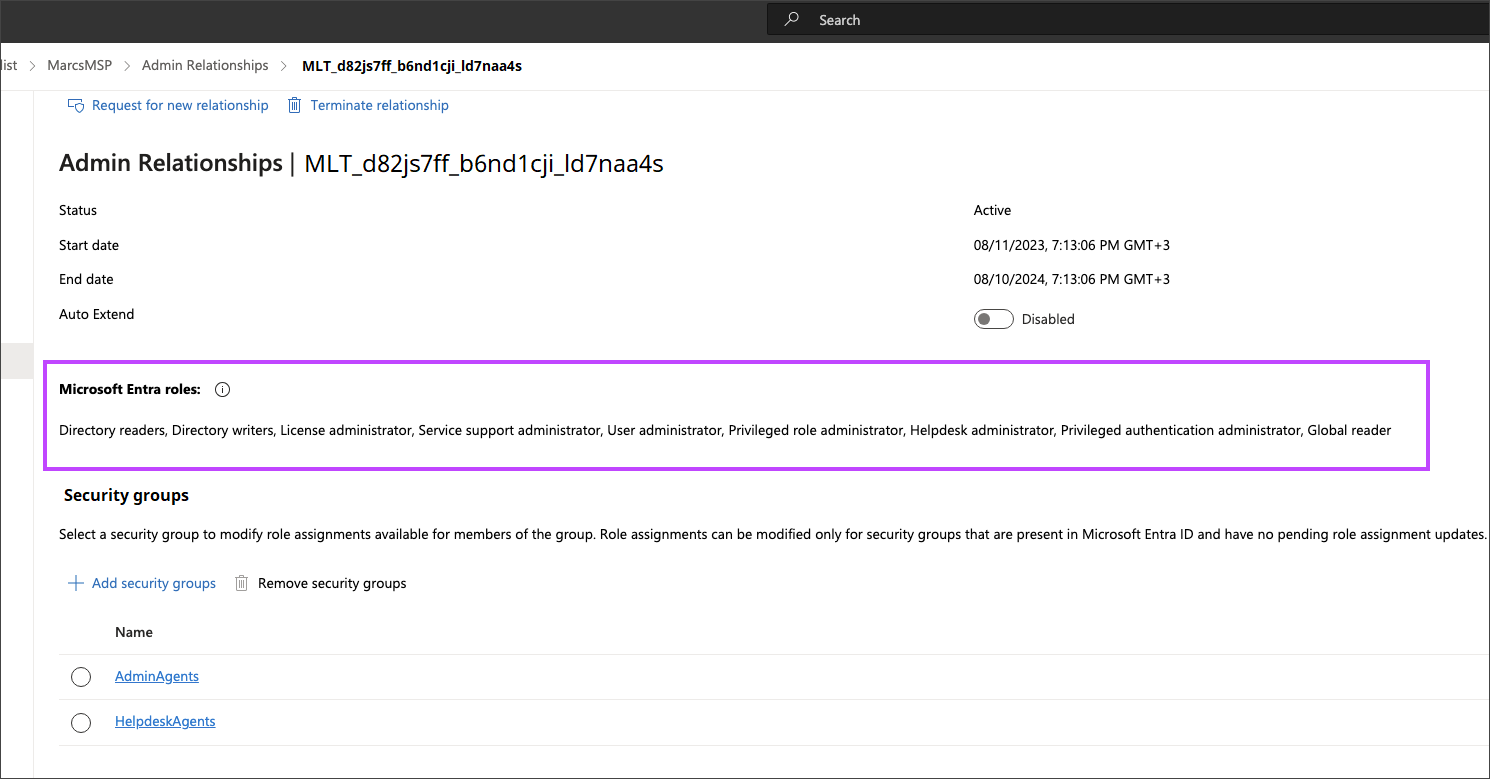
An admin relationship may have been automatically created by Microsoft. It will have the following name format:
{relationship name} + “_” + {unique id}. Locate and click on that admin relationship.
-
You need to verify what roles are a part of this admin relationship. If this one does not contain these roles, it needs to be deleted:
-
Groups administrator
-
Intune administrator
-
Cloud device administrator
-
Application administrator
-
Directory writers
To delete an admin relationship, click Terminate relationship at the top then Terminate relationship in the pop-up dialog.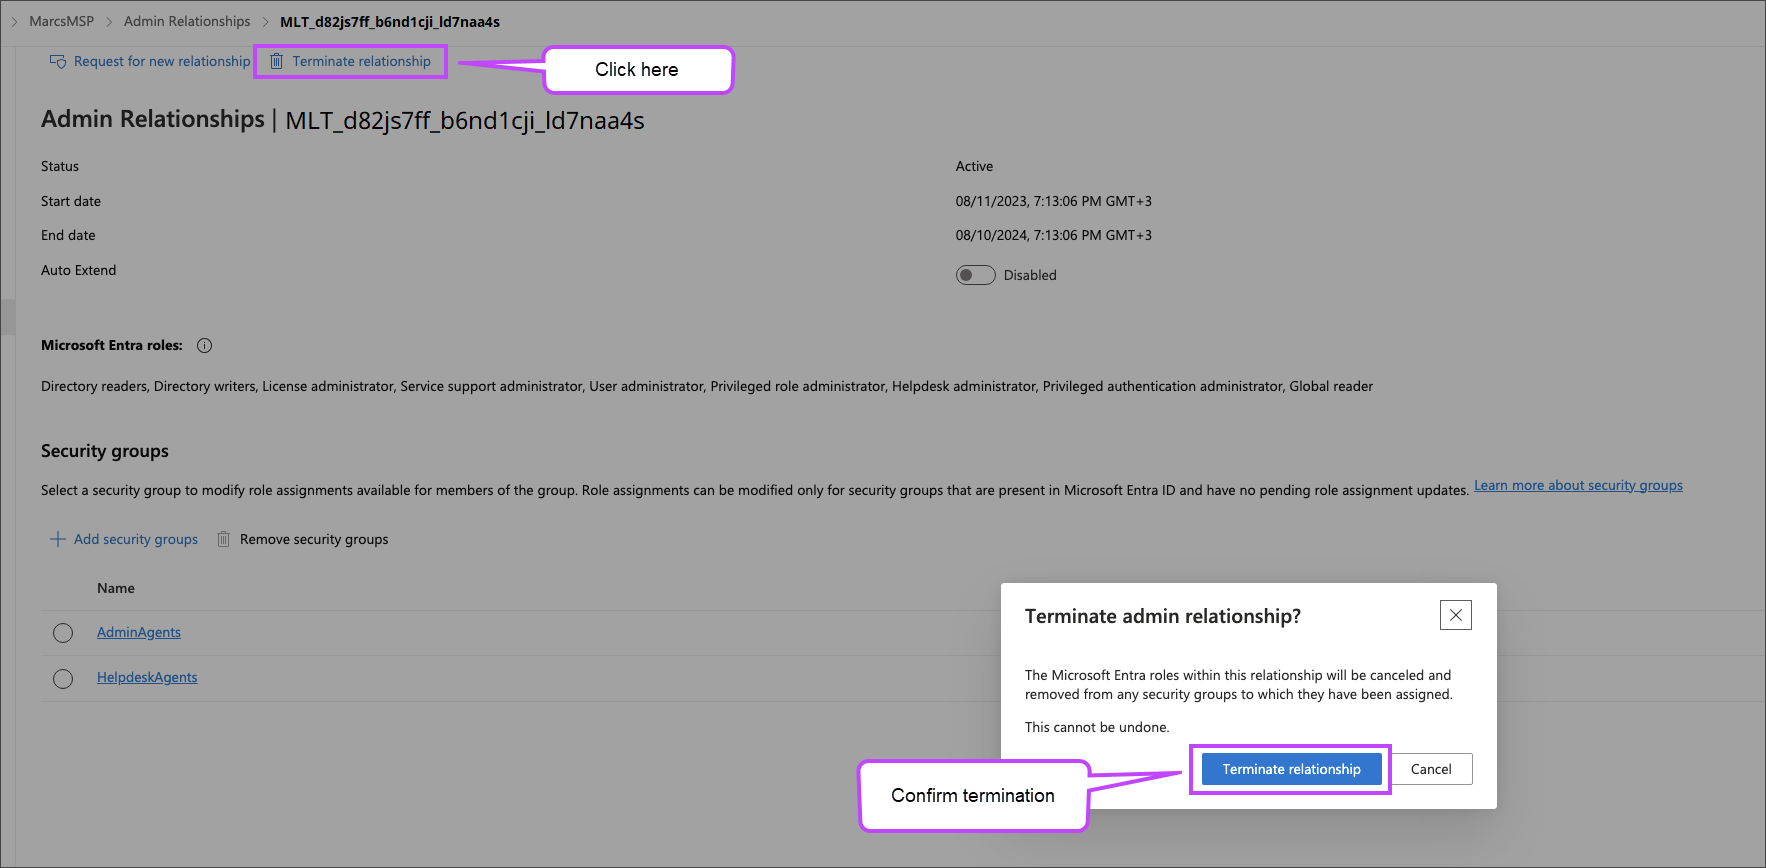
-
Once the old automatically generated GDAP relationship has been removed, the first stage is to create a new Admin Relationship in the Microsoft Partner Center and then send the invitation for the customer to accept and authorize the relationship.
-
Log in to the Microsoft Partner Center with your CSP Microsoft account credentials.
-
Click on the Customers Workspaces tile, or from the menu, choose Customers.
-
Search for and select the target customer .

-
Click Admin Relationships in the left side menu.
-
Click Request for new relationship.
-
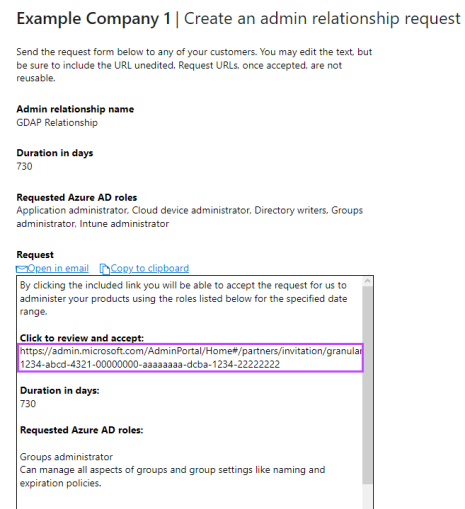
Complete the required fields in Create an admin relationship request:
-
Admin relationship name: a unique name for the relationship
The admin relationship name is visible to customers.
-
Duration in days: less than or equal to 730 days
-
-
Click Microsoft Entra ID role and choose the following roles to assume for your customer from the right-pane list:
-
Groups administrator
-
Intune administrator
-
Cloud device administrator
-
Application administrator
-
Directory writers
-
-
Click Save to add these roles to the relationship.
-
Click Finalize request to create the admin relationship invitation.
-
In the returned dialog, copy the link from the Click to review and accept section, using the Copy to Clipboard or the Open in email options, then click Done.
-
Send this to the customer to review and accept the invitation.
Please ensure the correct Microsoft tenant account is selected.
2. Configure the security group
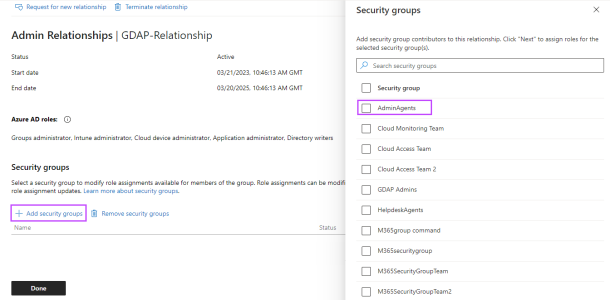
After the customer accepts the admin relationship invitation, the next state is to configure their security groups.
-
Go back to that customer's Admin relationships section.
-
Click on the relationship name.
-

-
Click Add security group.
-
Select AdminAgents.
-
Click Next and ensure all the roles selected in the above step 7 are checked:
-
Groups administrator
-
Intune administrator
-
Cloud device administrator
-
Application administrator
-
Directory writers
-
-
Click Save to confirm, and Done to apply.
3. Remove the DAP relationship
The final stage is to remove the existing DAP relationship for the customer.
-
Go to the Microsoft 365 admin center.
-
Click on All tenants in the left-side menu.
-
Search for then click on the target customer in the list .
-
Select Settings > Partner relationships in the left-side menu (click Show all if the Settings menu is not visible).
-
Click on the DAP relationship role under Other partner types.
-
Click Remove Roles to delete.

The above steps must be completed for ALL customers. Click 1. Create a new Admin Relationship for the customer to return to the first step.
Switch to GDAP Relationship
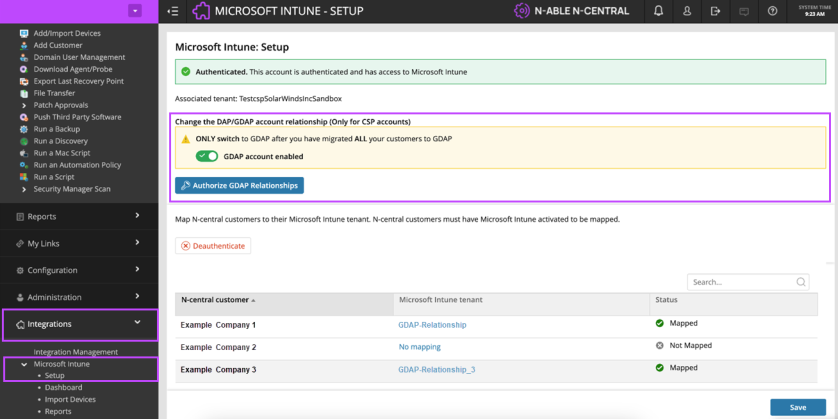
After ALL the customers are migrated, the final stage is to switch on the GDAP account enabled toggle in N-central.
-
Log into your N-central Dashboard.
-
Go to Integrations > Microsoft Intune > Setup.
-
Navigate to the Change DAP/GDAP account relationship (Only for CSP accounts) section.
-
Switch the GDAP account enabled toggle to on.
-
Once the dialog states "GDAP account enabled", click the Authorize GDAP Relationships button.
- Log in with the CSP Microsoft account credentials and wait for the flow to successfully finish.
An authorization window appears after you click on the Authorize GDAP Relationships button. Please be aware that some browser will consider this a pop-up and block the window from opening. To ensure the window opens, please allow pop-ups.
Please be aware that it may take a up to a minute for the flow to successfully complete and up to an hour for all the modifications to propagate to Microsoft.
Troubleshooting
-
If you receive the error, “Azure prerequisites not yet available. Please try again in a few minutes.”, click the Authorize GDAP Relationships button again in about 10 minutes (Azure does not always work in real-time).
-
If the “Authorize GDAP” flow above finished successfully and the calls for some of the customers fail (i.e. failing to retrieve the Compliance or Configuration Profile details under the Intune Integration), in N-central, go to Integrations > Intune > Setup and remap that specific customer.
"Authentication failed. MFA required" errors indicate that the account does not meet the Partner Security Requirements. You will need to contact your customer and make sure that they comply with the Partner Security Requirements. Microsoft offers a guide on how to check if an account is compliant: Testing the Partner Security Requirements.