Add a DNS Filtering block page
The integrated DNS Filtering feature in N-central is no longer available for new activations. Existing partners who already have it enabled, can continue using it until it's removed after March 31, 2026.
To use DNS Filtering, we recommend using the standalone version. See the DNS Filtering User Guide for details.
If you're currently using the integrated version, contact an N-able representative with your account name and contact information to begin your migration. For details, see Migrate to standalone DNS Filtering.
A block page is what users see when they try to visit a domain that is blocked by DNS Filtering.
There are two types of block pages:
-
A hosted block page that halts a user and presents organizational information, as well as options to enter a bypass password or notify the administrator.
-
An external block page that immediately sends a 302 redirect to a location that you set, either a local-only resource, for example, http://office.local/block.html or a public resource, for example, http://validdomain.com/block.html.
To enable a block page on devices, you must apply it to a DNS Filtering profile.
-
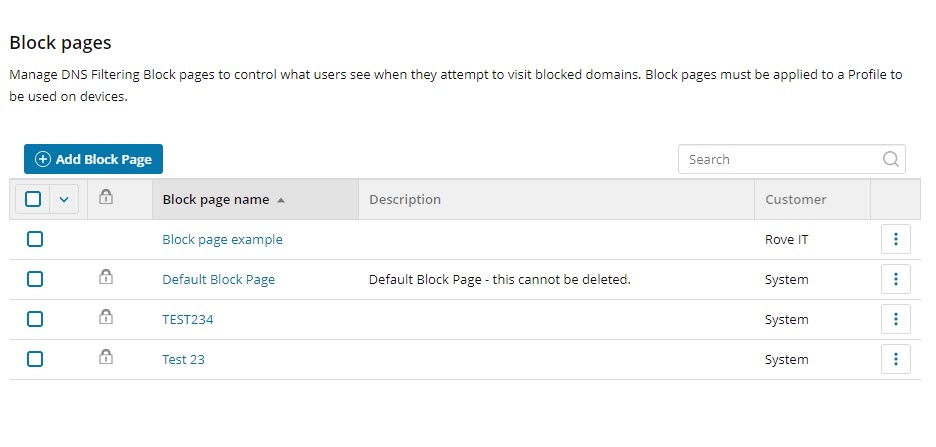
Go to Integrations >DNS Filtering > Profiles - Block Page.

-
Click Add Block Page.

-
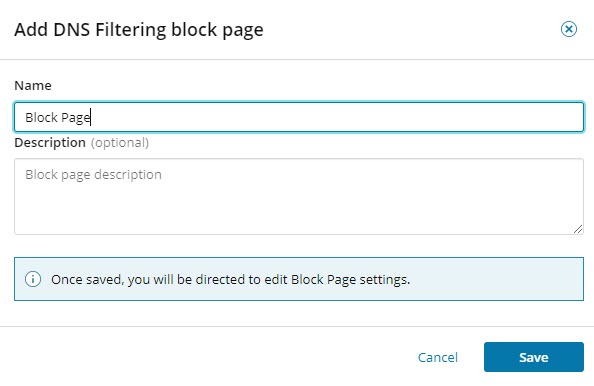
Enter a name and description for the block page and click Save.

-
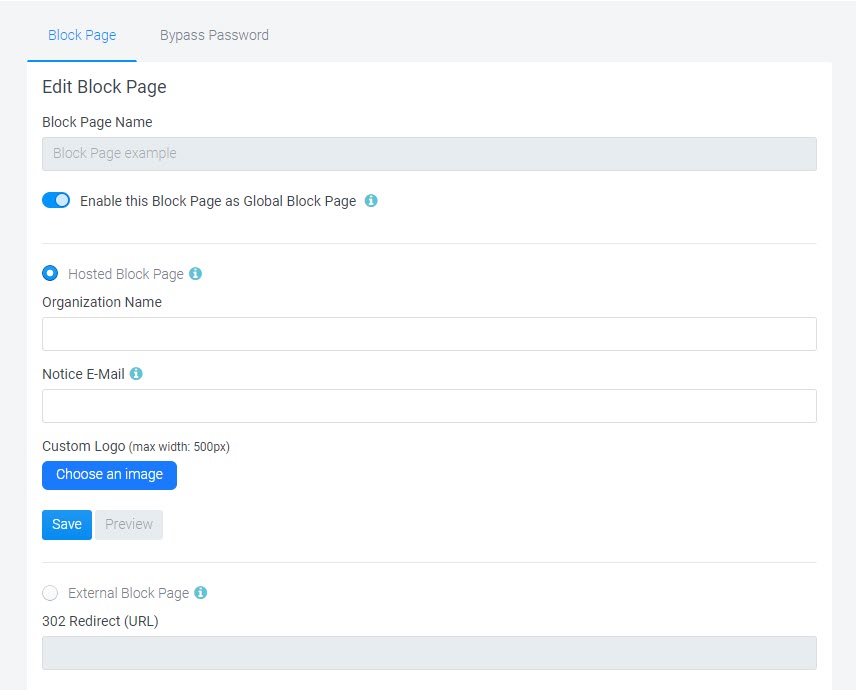
Enable the Enable this Block Page as a Global Block page to set your block pages as a global block page. This allows you to share the current block page with other sub-organizations.
-
Select Hosted Block Page or External Block Page.
-
If you selected Hosted Block page page:
-
Enter the organization name and Notice E-mail address. The Notice E-mail address allows end users requests to unblock a domain.
-
If you want end users to use a password to temporarily bypass all content filtering restrictions when prompted with a block page, click the Bypass Password tab and enable Display Block Page Bypass Option.

-
Enter a bypass password and click Save.
-
Click Finish to return to the list of block pages.
-
-
If you selected External Block Page:
-
Enter the 302 redirect URL and click Save. An external block page immediately sends a 302 redirect to a location that you set (local-only or public).
-
Click Finish to return to the list of block pages.
-
