
View and modify a user's role
Modifying a user's role in N-central, or any similar remote monitoring and management (RMM) platform, is usually done to manage access and permissions for different users based on their responsibilities and requirements. User roles help define what actions a user is allowed to perform within the system. Here are some common reasons for changing a user's role in N-central Multi-Instance:
-
Security: Adjusting a user role helps to ensure they only have access to the features and functions necessary for their job responsibilities. This helps to minimize the risk of unauthorized access or misuse of sensitive information.
-
Job Responsibilities: When employees take on new responsibilities, their access needs may change. Adjusting user roles allows you to align the system's permissions with the user's current job functions.
-
Compliance: There are sometimes strict compliance requirements that dictate who can access certain types of data or perform specific actions. Changing user roles can help maintain compliance with these regulations.
-
Efficiency: Tailor user roles to specific roles or departments to improve operational efficiency by providing users with the tools they need without cluttering the interface with unnecessary features.
-
Access Control: User roles help in implementing the principle of least privilege, where users are granted the minimum level of access needed to perform their job functions. This reduces the risk of accidental or intentional misuse of system features.
-
Organizational Changes: Changes in the organizational structure, such as team restructuring or personnel changes, updating user roles helps in align system access with the new structure.
Regularly reviewing and updating user roles is good practice to ensure that system access and permissions remain appropriate as your organization's needs evolve over time.
-
In the left panel, click the User Management icon.
-
Select the user (s) and click Assign Group.

-
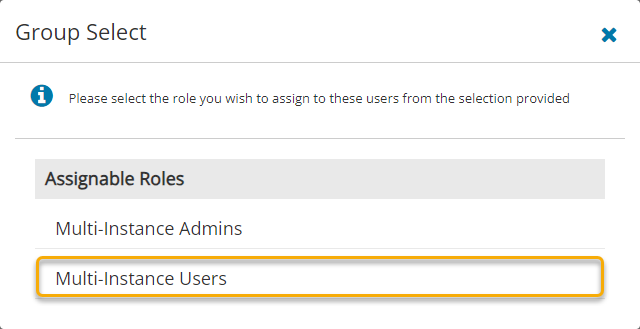
Select the new role you want to assign.
-
Click Save to save your changes and close or click Save and Stay to save and continue.